
In this blog post, we are excited to introduce you to one of our amazing features: Rejuvenate processing mode. We’ll show you a few possible ways you can use it to revive and rejuvenate your images, as its name suggests. However, it is up to your curiosity to find even more creative ways to use it. The more you experiment with it, the more familiar you will be with what it can do.
Everyone has photos that are important because they capture cherished memories. However, sometimes in the heat of the moment, we can’t focus on image quality, or we don’t have the right equipment, resulting in blurry, out-of-focus photos. Or perhaps we want to breathe new life into old, scratched, or faded photos. Or maybe we generated something with Tengr.ai that has a slight flaw. We might want to correct this to enhance clarity while preserving the rest of the image. In all these cases, Rejuvenate can help. We just need to give it a chance and experiment to discover its strengths. We’ll show you practical examples in this blog post.
What is Rejuvenate Mode?
Rejuvenate is an innovative processing mode within Tengr.ai. Its main strength is reviving photos, and restoring their detail clarity and vibrancy of the colors. Whether you have a blurry image, an old analog photo, or a picture with scratches and fading, Rejuvenate can bring back the original beauty of your photos.
Ways to Use Rejuvenate Mode
All you have to do is upload the photo that you want to restore and select the Rejuvenate processing mode. You can use it without a prompt or enter specific requests like ‘photo restoration’, ‘enhance clarity’, ‘remove scratches’, or ‘revive colors’. These are just a few tips to get you started. Try different styles and see which one gives your image the desired effect. For instance, applying the Photographer style can give your restored photo a professional touch. We experimented with this style and were pleased with the unique effects it brought to our photos. Let’s see Rejuvenate in action through a few examples:
Restoring a Blurry Photo of an Old House:
Our first example is an image of an old house that is out of focus and blurry. We tried to make it clearer and sharper with the help of our handy tool, Rejuvenate. You might also have an old photo of a building or place that has lost its detail and color over time and you’d like to make it look as vibrant and beautiful as it once was. We wanted to show you how easy it is.
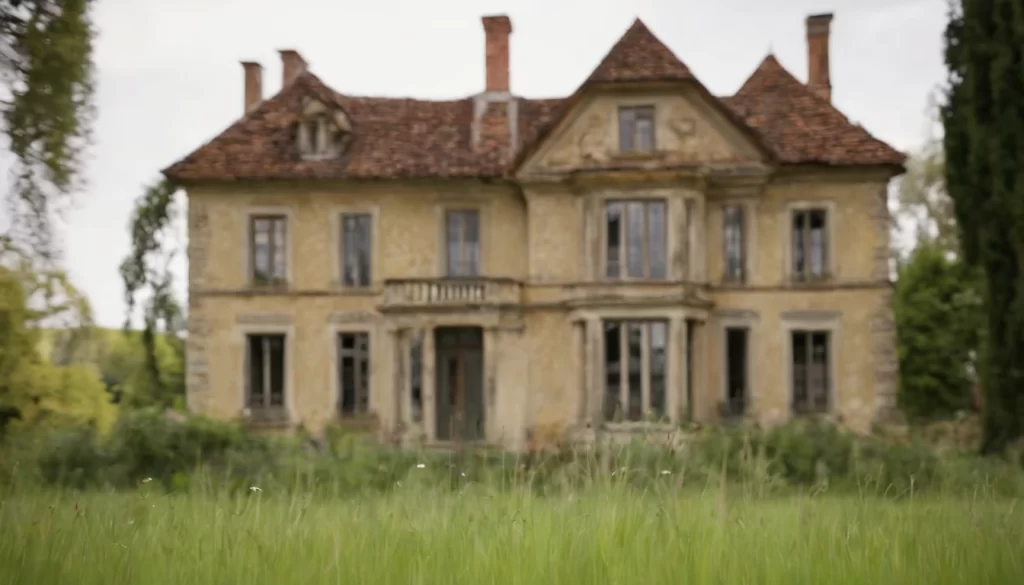
First, we uploaded the image using the “New from Image” option. Then, we selected Rejuvenate processing mode, with the level set to ‘Strongly’. The prompt was: “Clean, sharp focus, enhance clarity”. We kept the style at Default, and set Creativity and Details to 3.
As a result, we got images with clearer details and noticeable improvements in the house’s structure and windows. It also revived the colors. In some pictures, it changed a few details (e.g., details of windows or adding stairs), because when the details are extremely blurry, or not visible because the photo is damaged, Tengr.ai is trying to figure out what could have been there, it tries to restore every detail. Sometimes it makes mistakes, but it still gives amazing results.
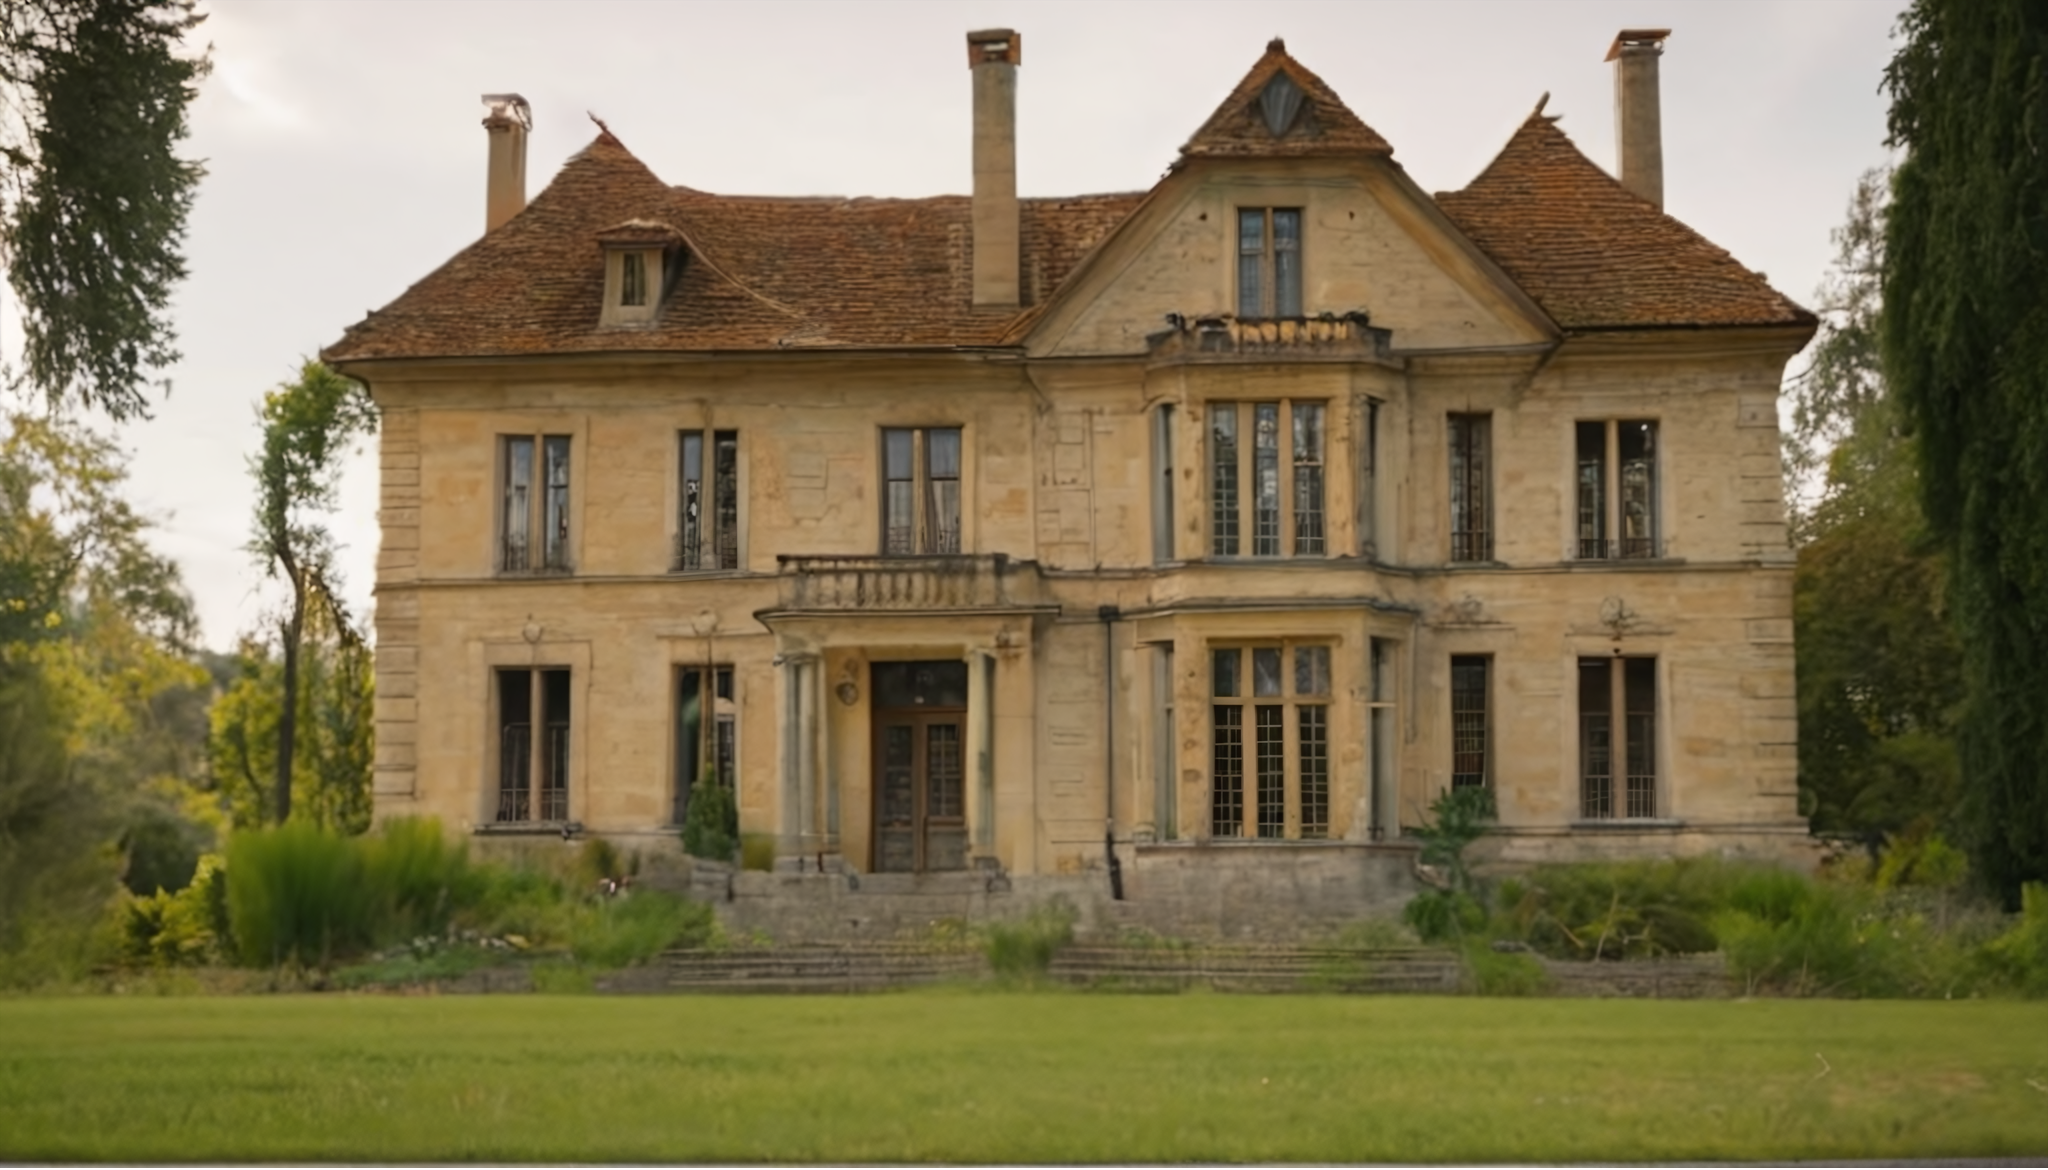
We were happy with this result but wanted to show you the effect of using ‘Extremely’ instead of ‘Strongly’. Be aware that the higher the level, the more changes it will produce in the image. So, if you want to keep every small detail, we don’t advise using the ‘Extremely’ level, as it can cause changes in the image. However, we wanted to show you what it can do.
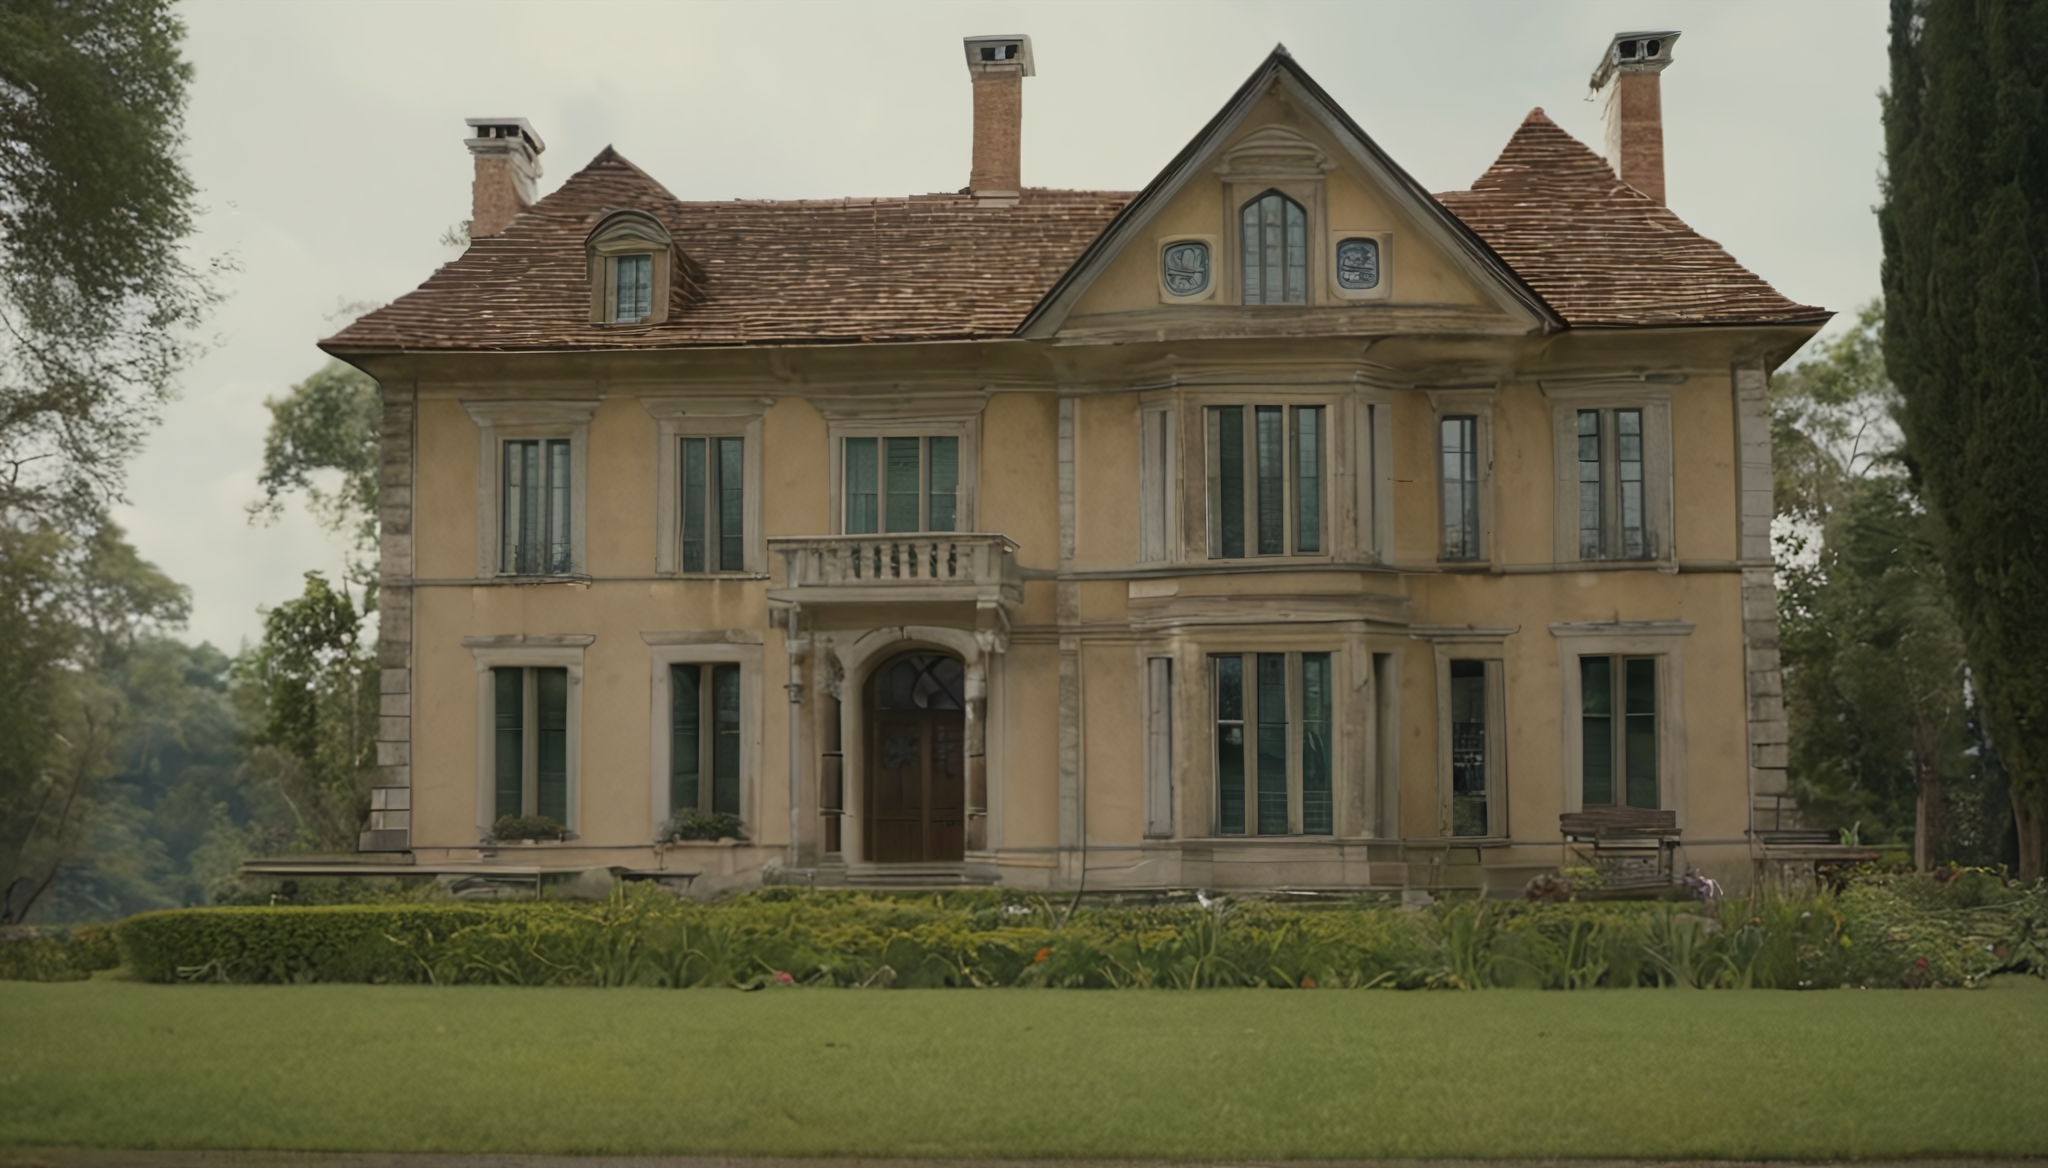
Here, it provided even more clarity and sharpness, bringing out intricate details like the textures of the walls and roof. It also gave a more vivid appearance. The image looks crisp and well-defined. Overall, the result is truly amazing.
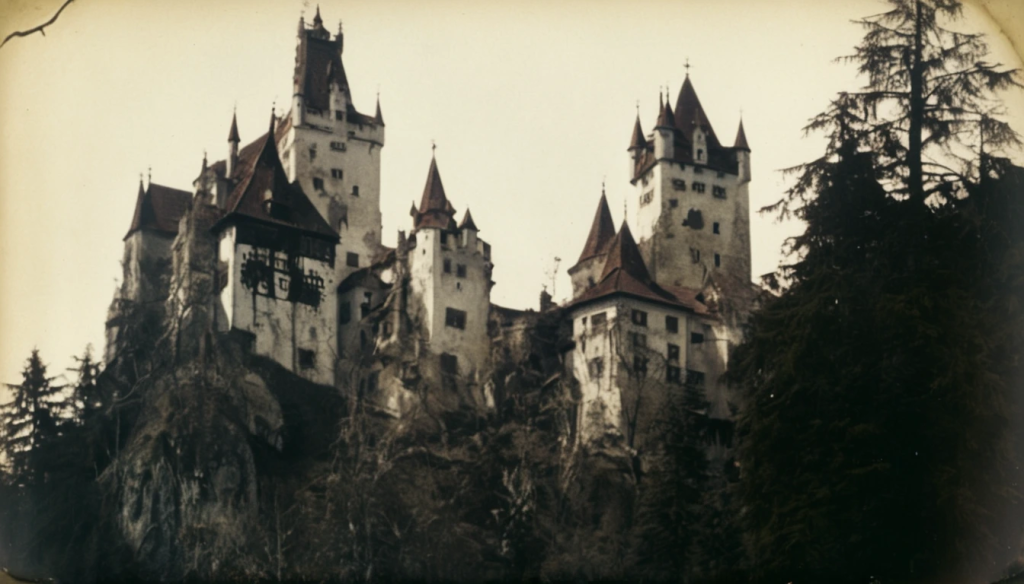
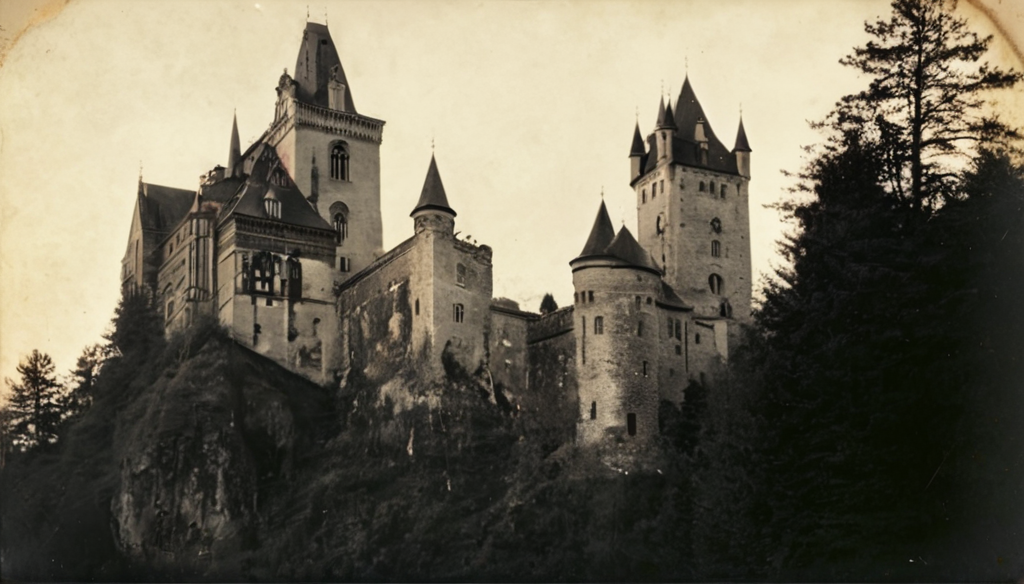
This example demonstrates the progressive enhancement capabilities of Rejuvenate mode, showing how different levels of processing can bring out varying degrees of detail and clarity in photos. We did the same test with an old, damaged image of a castle. We saw improvements in the quality of the image here as well. The details became clearer, and Rejuvenate managed to restore much of the photo’s original beauty, even with the level set to ‘Normally‘:
Reviving a Damaged Analog Photo:
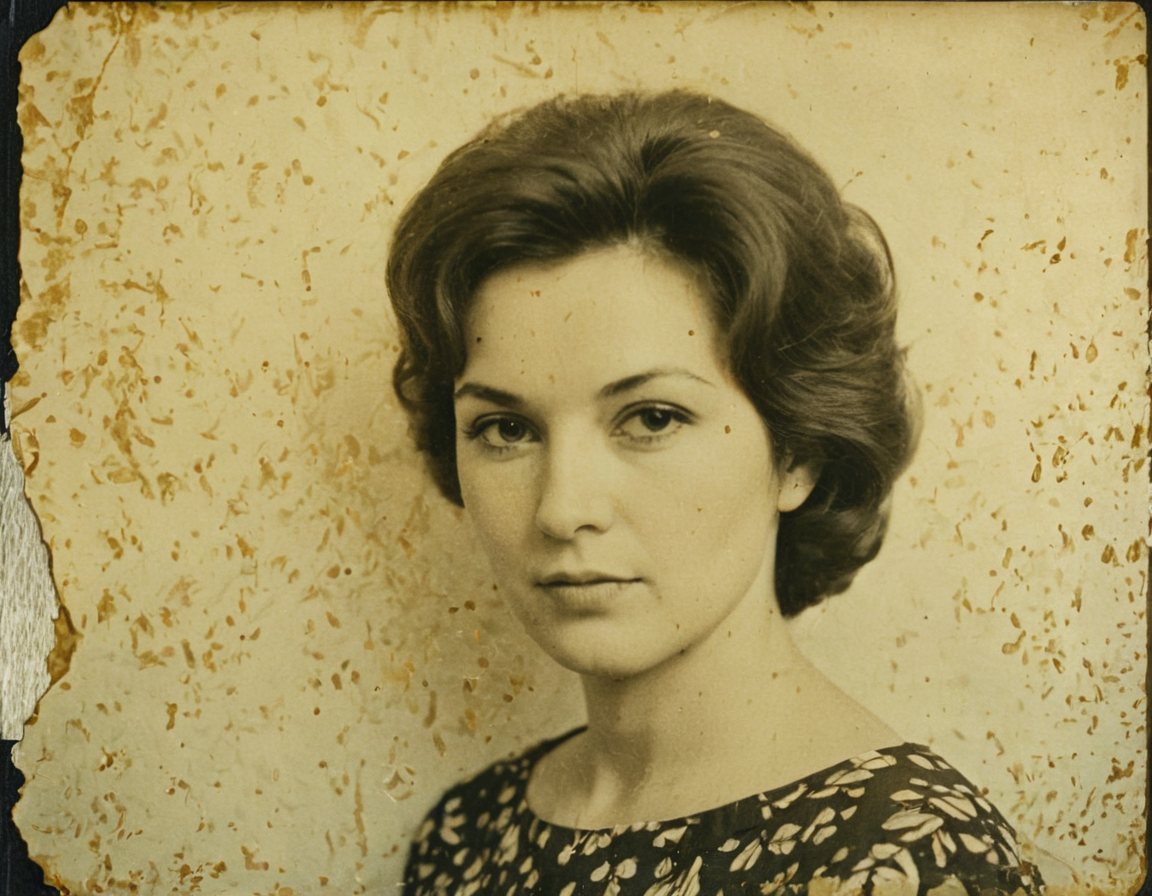
We also wanted to show you how amazingly it can revive and restore old analog photos with scratches and wear marks. We tried to revive a yellowed, faded, scratched photo of a woman from the 1970s without entering any prompt. Let’s see how that turned out:

First, we uploaded the image using the ‘New from Image’ option. Then, we selected the Rejuvenate processing mode with the lowest strength, ‘Very Subtle’. We then selected the Photographer style, Creativity at 3, Details at 4 and pressed Generate. The results were already amazing. It cleared out many imperfections from the photo, and even the scratches in the face area were diminished significantly.
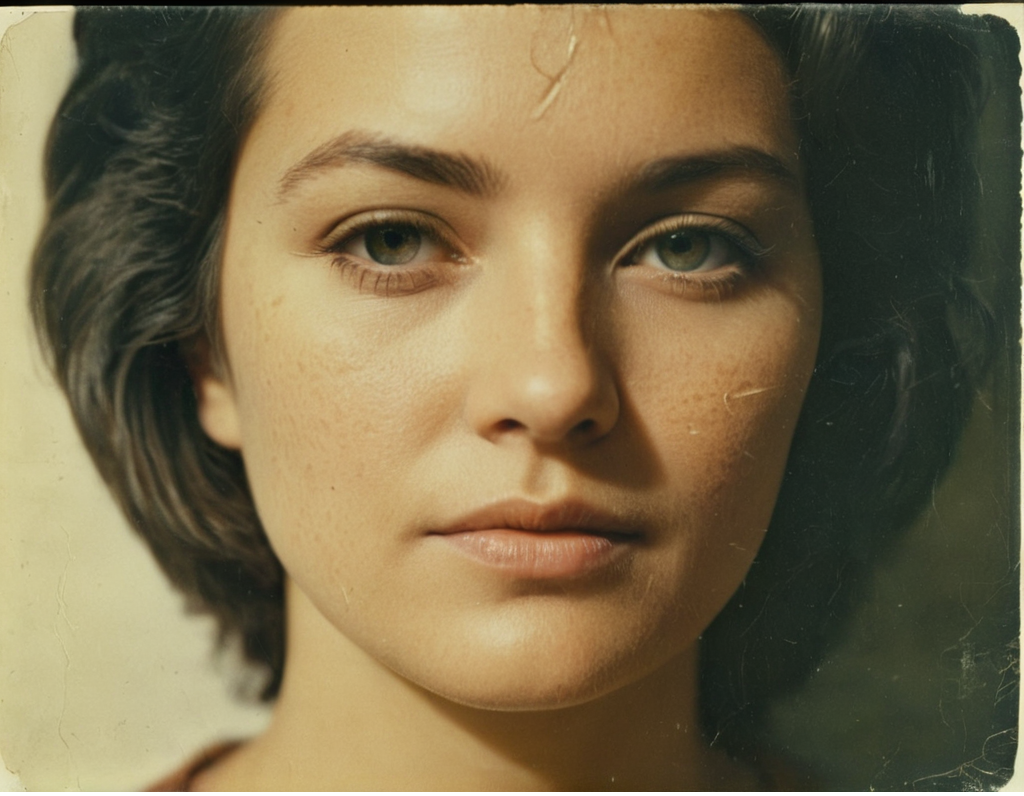
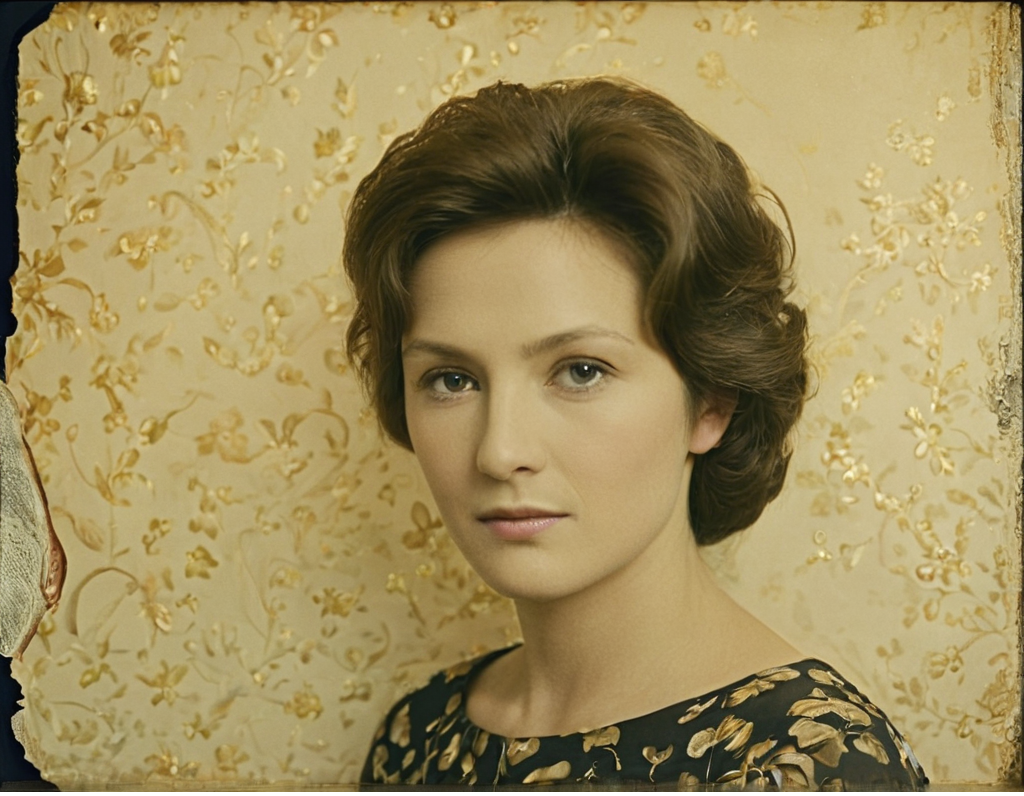
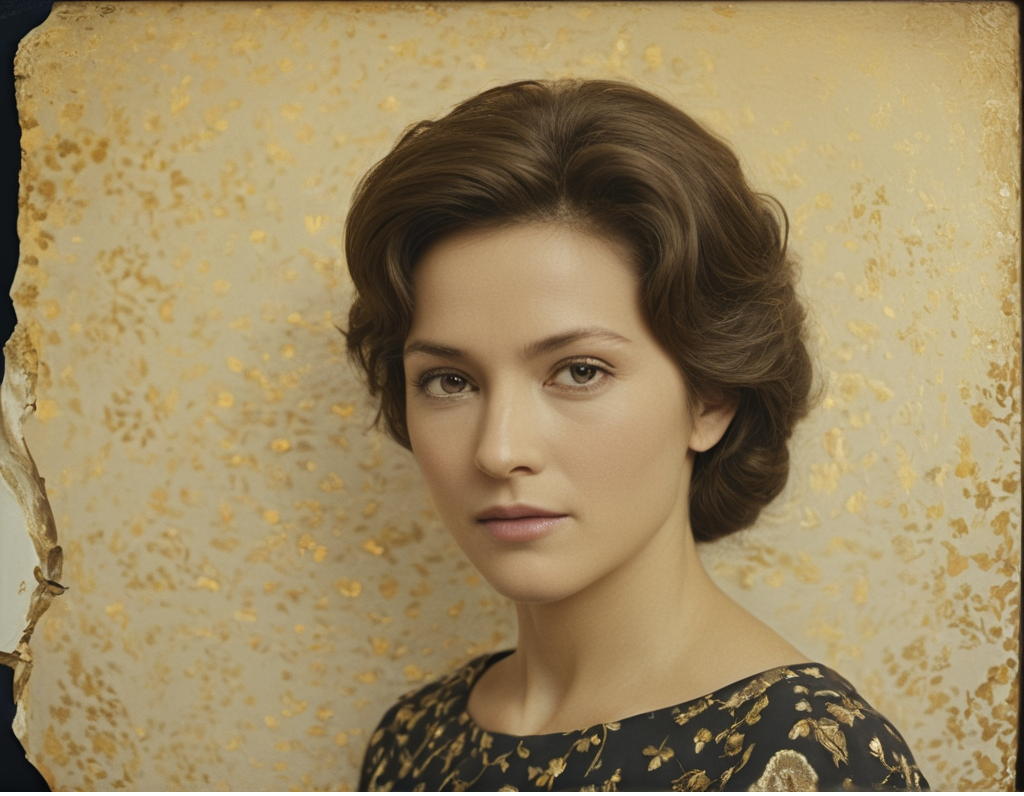
We wanted to see what it can do at ‘Subtle’ level. This time, the scratches and flaws totally disappeared. We even saw improvements in the sides of the photo, which were damaged. We didn’t see the need for further improvements, but just for the sake of curiosity, we tried the ‘Normally’ level as well.
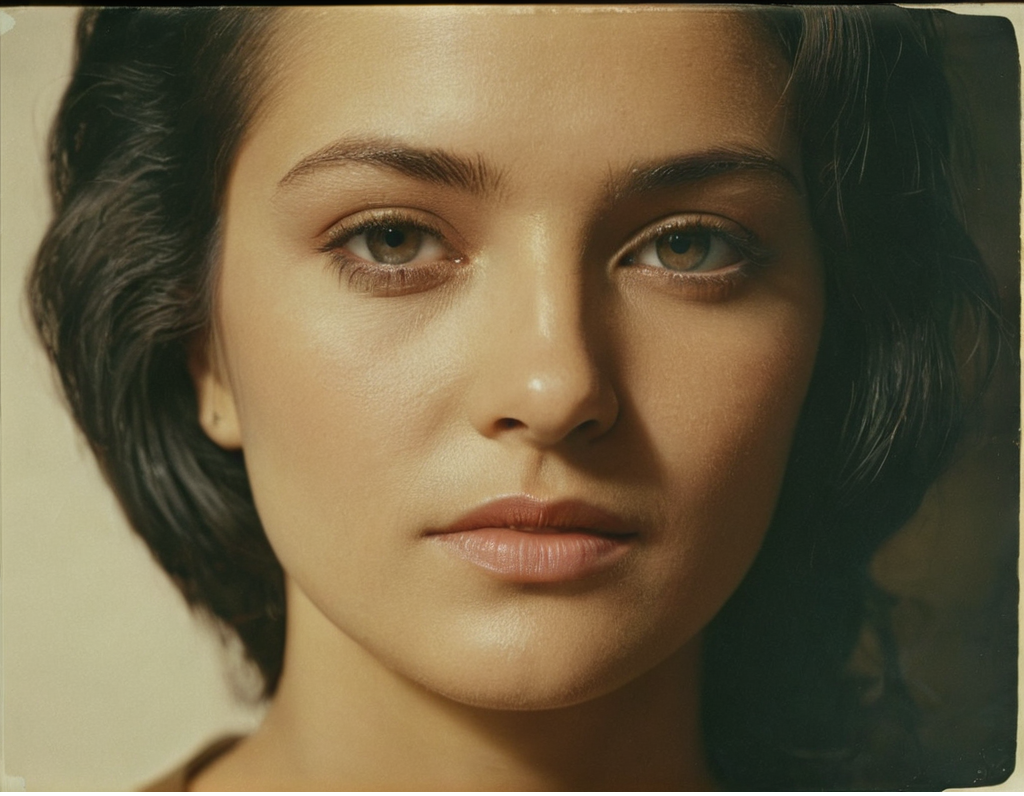
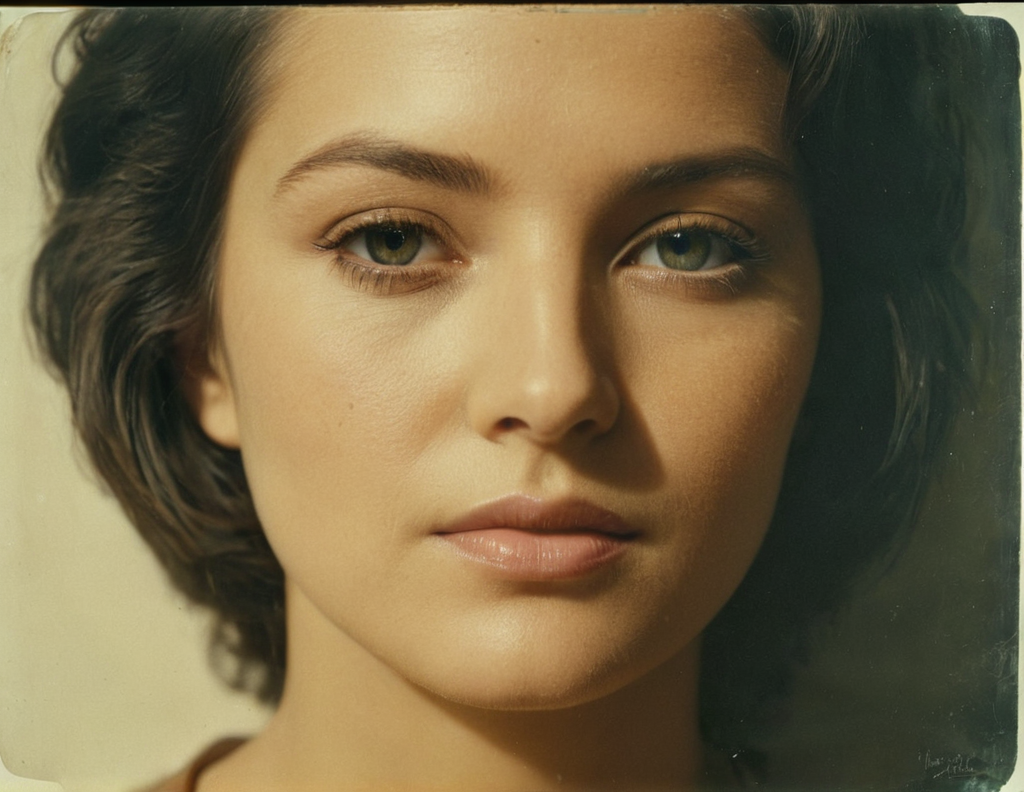
Using higher levels isn’t recommended with portraits, as sometimes it can alter facial features, which is not a desirable result when restoring old photos. Let’s see what we got with ‘Normally’. In our case, the face remained unchanged, which is good. We were truly happy with the result even if there weren’t any more flaws to correct. The colors were restored and vibrant, the contrast improved, and the images remained realistic, so it’s amazing result with just a few clicks. We also noticed that it removed the ‘aged look,’ giving the photo a smoother appearance. If this is your goal, Rejuvenate is the best choice. Let’s see another example of an old, analog photo:
Fixing Minor Flaws:
There are times when you generate an image that you really like, but there is a minor flaw on the face of your subject. In these cases, Rejuvenate might help correct these imperfections.
We’ve brought you an example for this as well:
We had an image generated with Tengr.ai that we really liked, but it had a flaw in the face area. So, we tried to fix it. We uploaded the image and selected the Rejuvenate processing mode, set to ‘Subtle‘. For this purpose, we chose the Fairytale style with Details and Creativity both set to 3. As you can see, the ‘rejuvenation’ really helped.

Conclusion
By showcasing a variety of use cases, we’ve demonstrated the versatility and power of Tengr.ai’s new Rejuvenate processing mode. Be sure to try it out yourself and see its amazing capabilities. You might even find new creative ways to enhance your artwork.
Check out our video tutorial to see Rejuvenate mode in action. Watch as we transform old, blurry, and damaged photos into clear, beautiful images. Try this new Rejuvenate feature of Tengr.ai and bring your treasured memories back to life!
Or, if you’d like to watch more videos and learn about the various features and tools of Tengr.ai, check out our blog post featuring 11 videos to help you get familiarized with Tengr.ai.