
Introducing Recipes: build your AI workflow once, run it forever
Most creative work isn’t one prompt and one output. It’s a sequence — a sketch becomes a finished image, the image gets upscaled, then turns into a video, a caption gets written to match. Normally that means jumping between tools, re-uploading files, and doing the same manual handoff every single time you want to repeat it.
Recipes change that. It’s a visual canvas inside Alberti Studio where you drag models onto a workspace, wire them together, and let your output become someone else’s input automatically — sketch to image to motion, all in one run.
Getting started, from zero
Building your first recipe comes down to five steps: click New recipe, drag the models you want from the left-hand menu onto the canvas, give each one its instructions, dial in its settings, and connect the nodes together so one feeds the next.
How it works
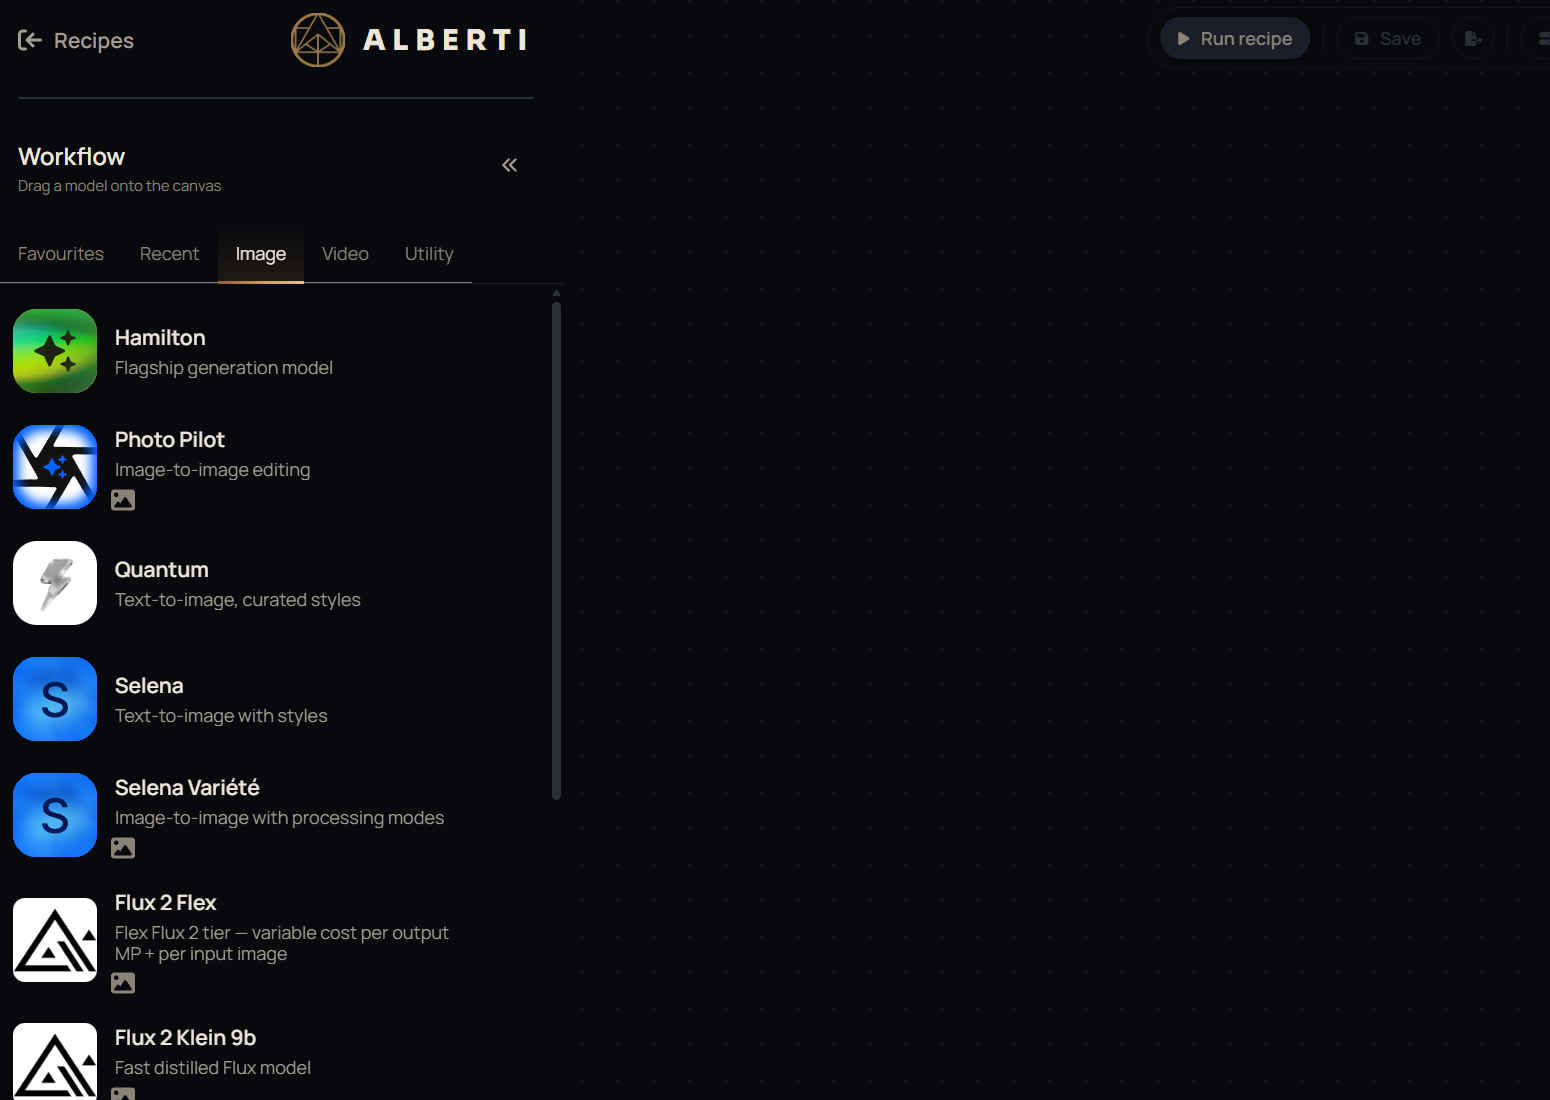
Open the model library on the left — organized into Favourites, Recent, Image, Video, and Utility — and drag any model onto the canvas — for example Hamilton for generation, Photo Pilot for image-to-image editing, Kling V3 for video, and more other variations. Each one lands as a node with its own prompt box and settings.
Connect the nodes and the output of one becomes the input of the next. Depending on what a given model accepts, you can also attach your own images, audio, or video straight into a node — no separate upload step, no switching tabs.
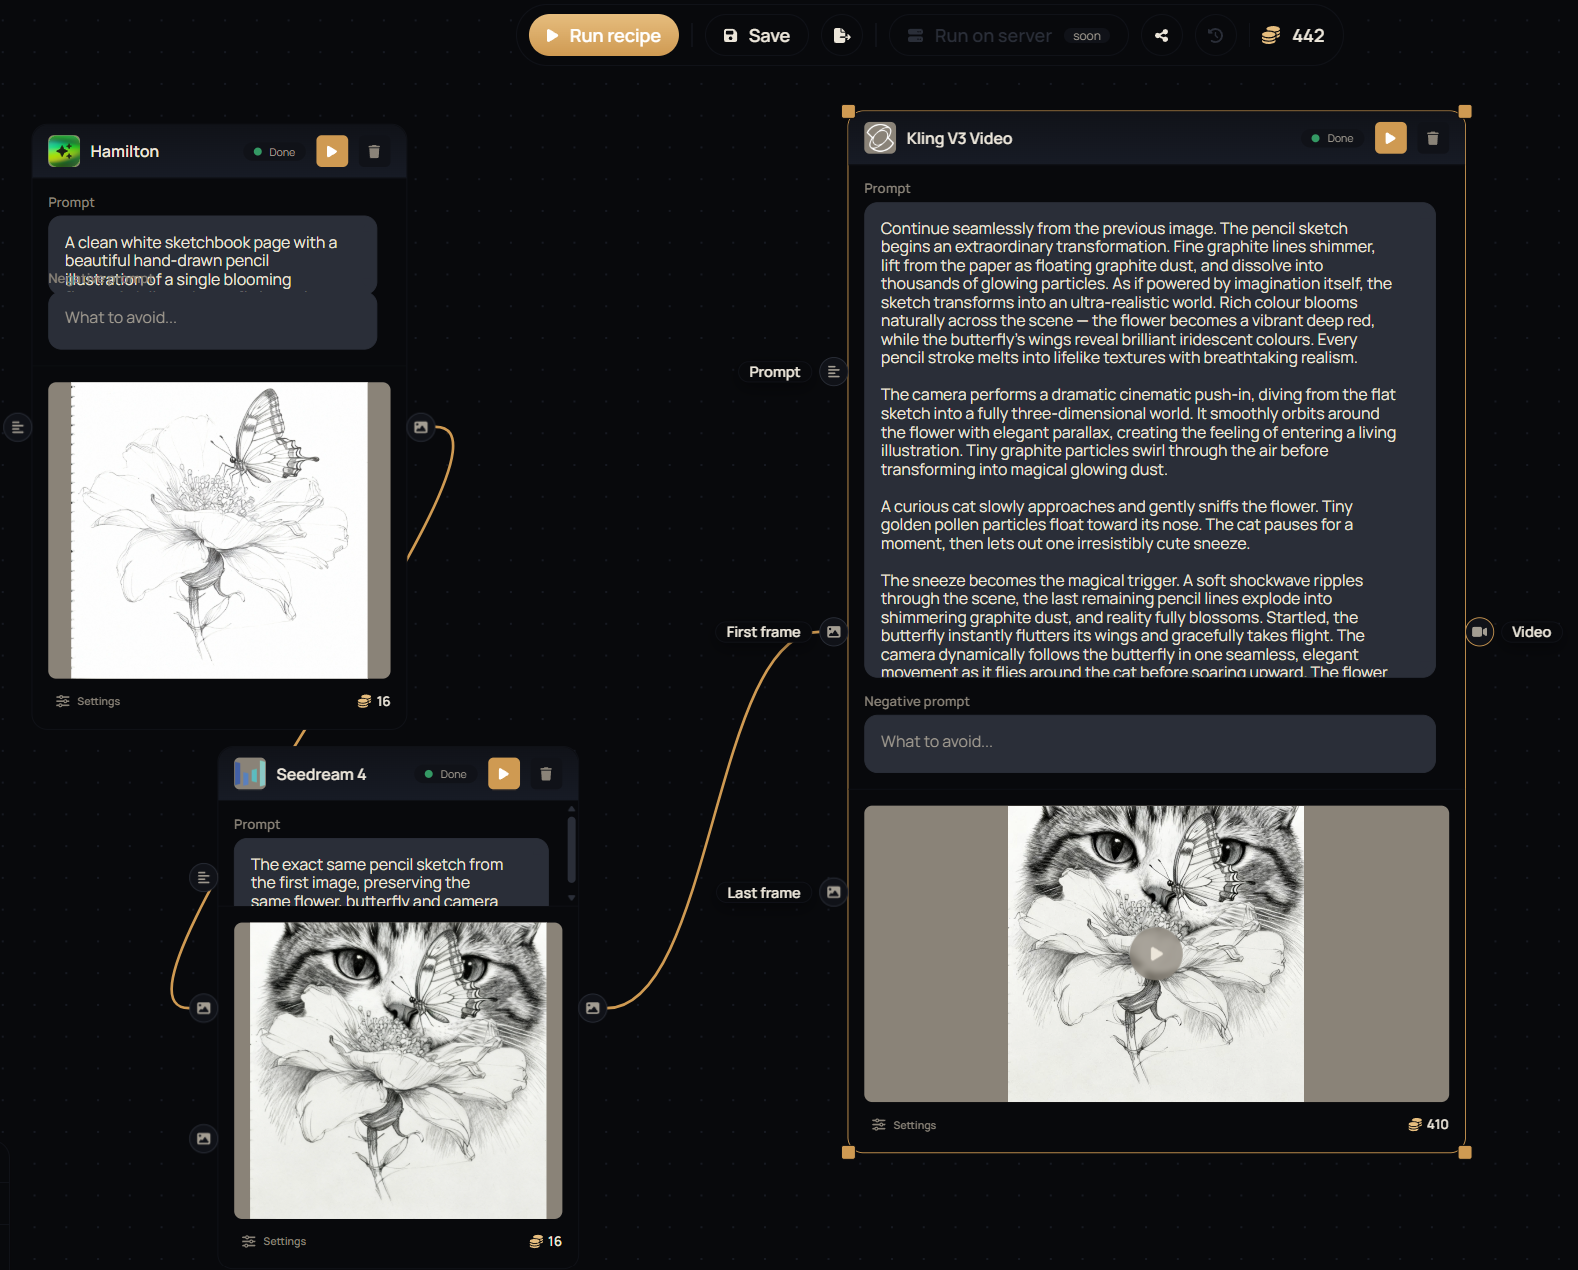
Remember the cat-and-flower film from our last post? Here it is again — not just as a story this time, but as an actual, saved recipe you can open and run yourself. Three models, one connected recipe, one finished video — we first told this story in Meet Alberti Studio: from a blank page to film in three prompts; now you can open the exact recipe behind it.
The Utility nodes
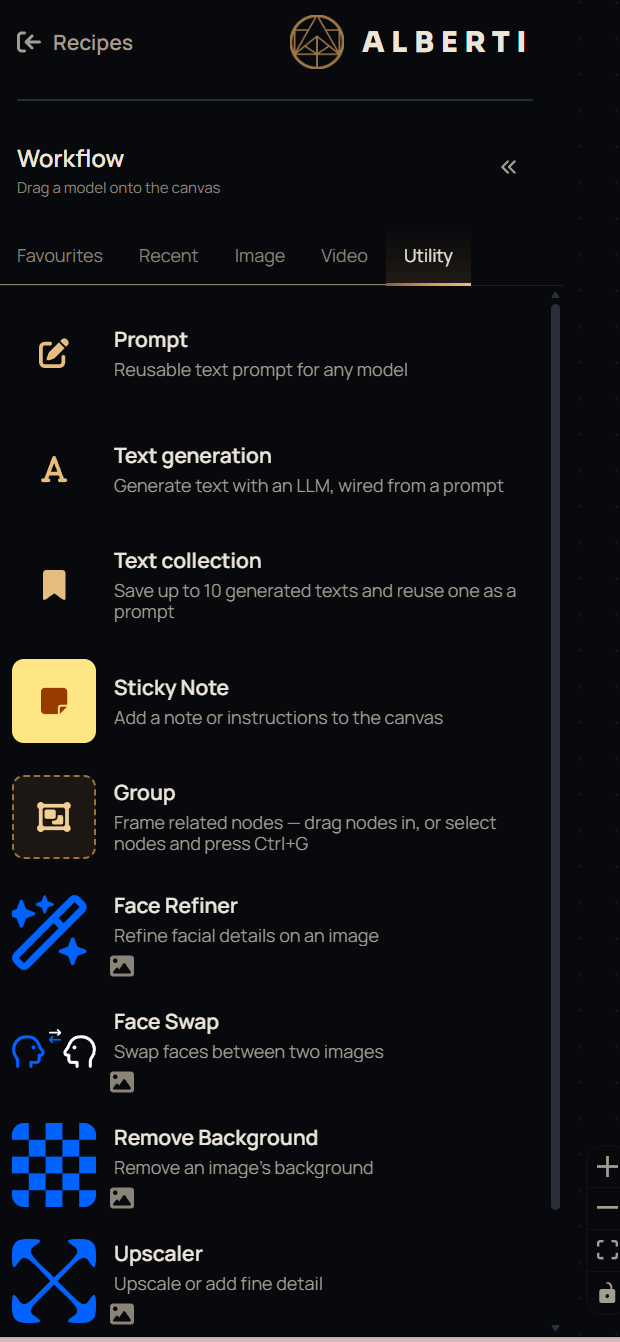
Alongside the image and video models, a handful of Utility nodes make recipes easier to build and maintain:
- Prompt — a reusable text prompt block you can wire into any model, so you’re not retyping the same description in five places.
- Text generation — an LLM node that writes or expands a prompt for you.
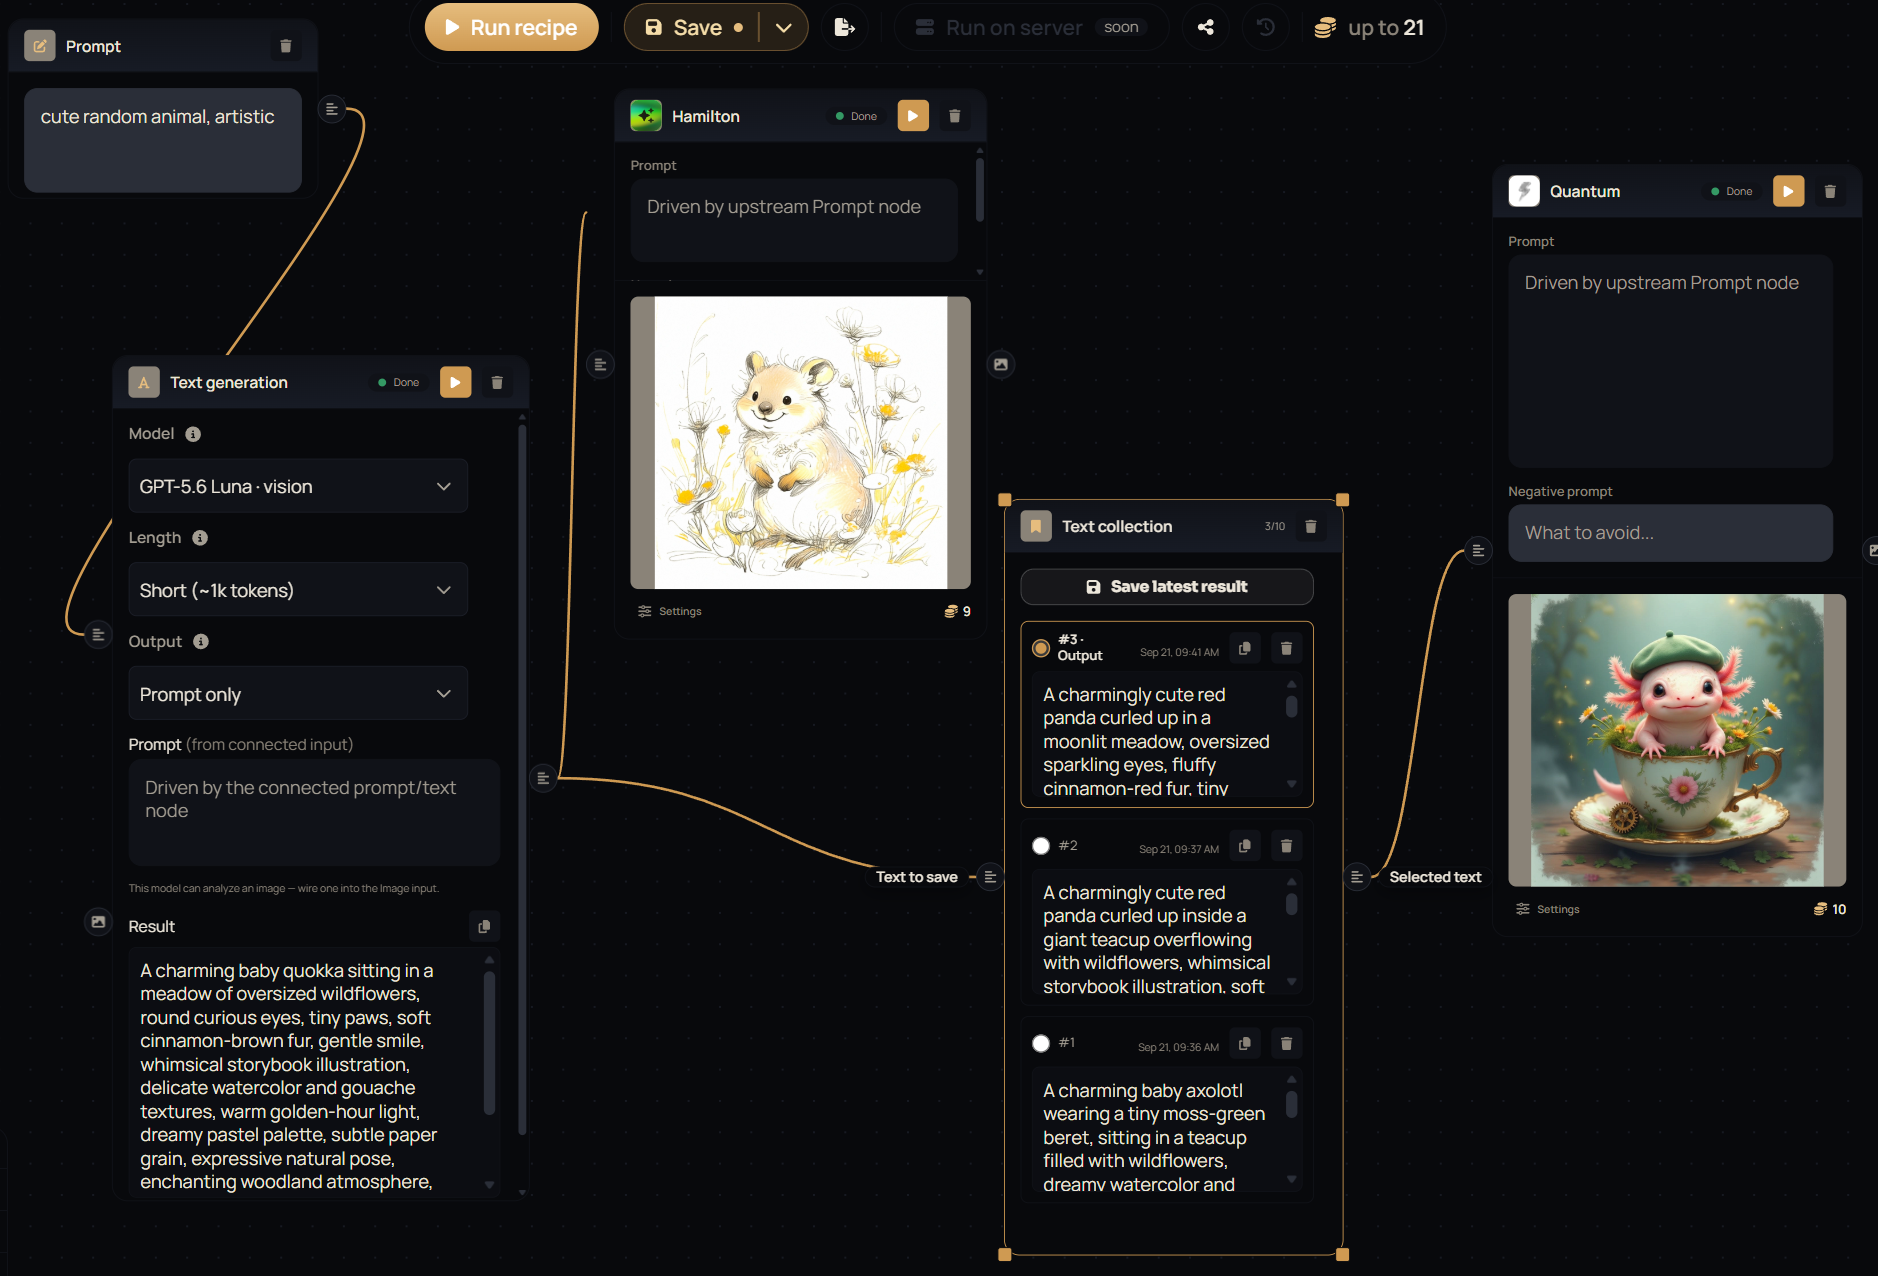
- Text collection — holds onto multiple outputs from a Text generation node so you can pick which one moves on.
- Sticky Note — a plain note you can drop anywhere on the canvas to leave yourself or a teammate instructions or context.
- Group — frames a cluster of nodes together and gives them a name and a color, so a bigger recipe stays easy to read.
Once a recipe grows past a handful of nodes, Group is what keeps it readable. Select the nodes that belong together, frame them, and you get a labeled box you can drag and collapse as one unit. Rename it from the pencil icon on the group’s header, give it its own color so it stands out from the rest of the canvas, and ungroup it later if you’d rather have the nodes loose again — nothing inside gets deleted, it just goes back to being separate nodes.
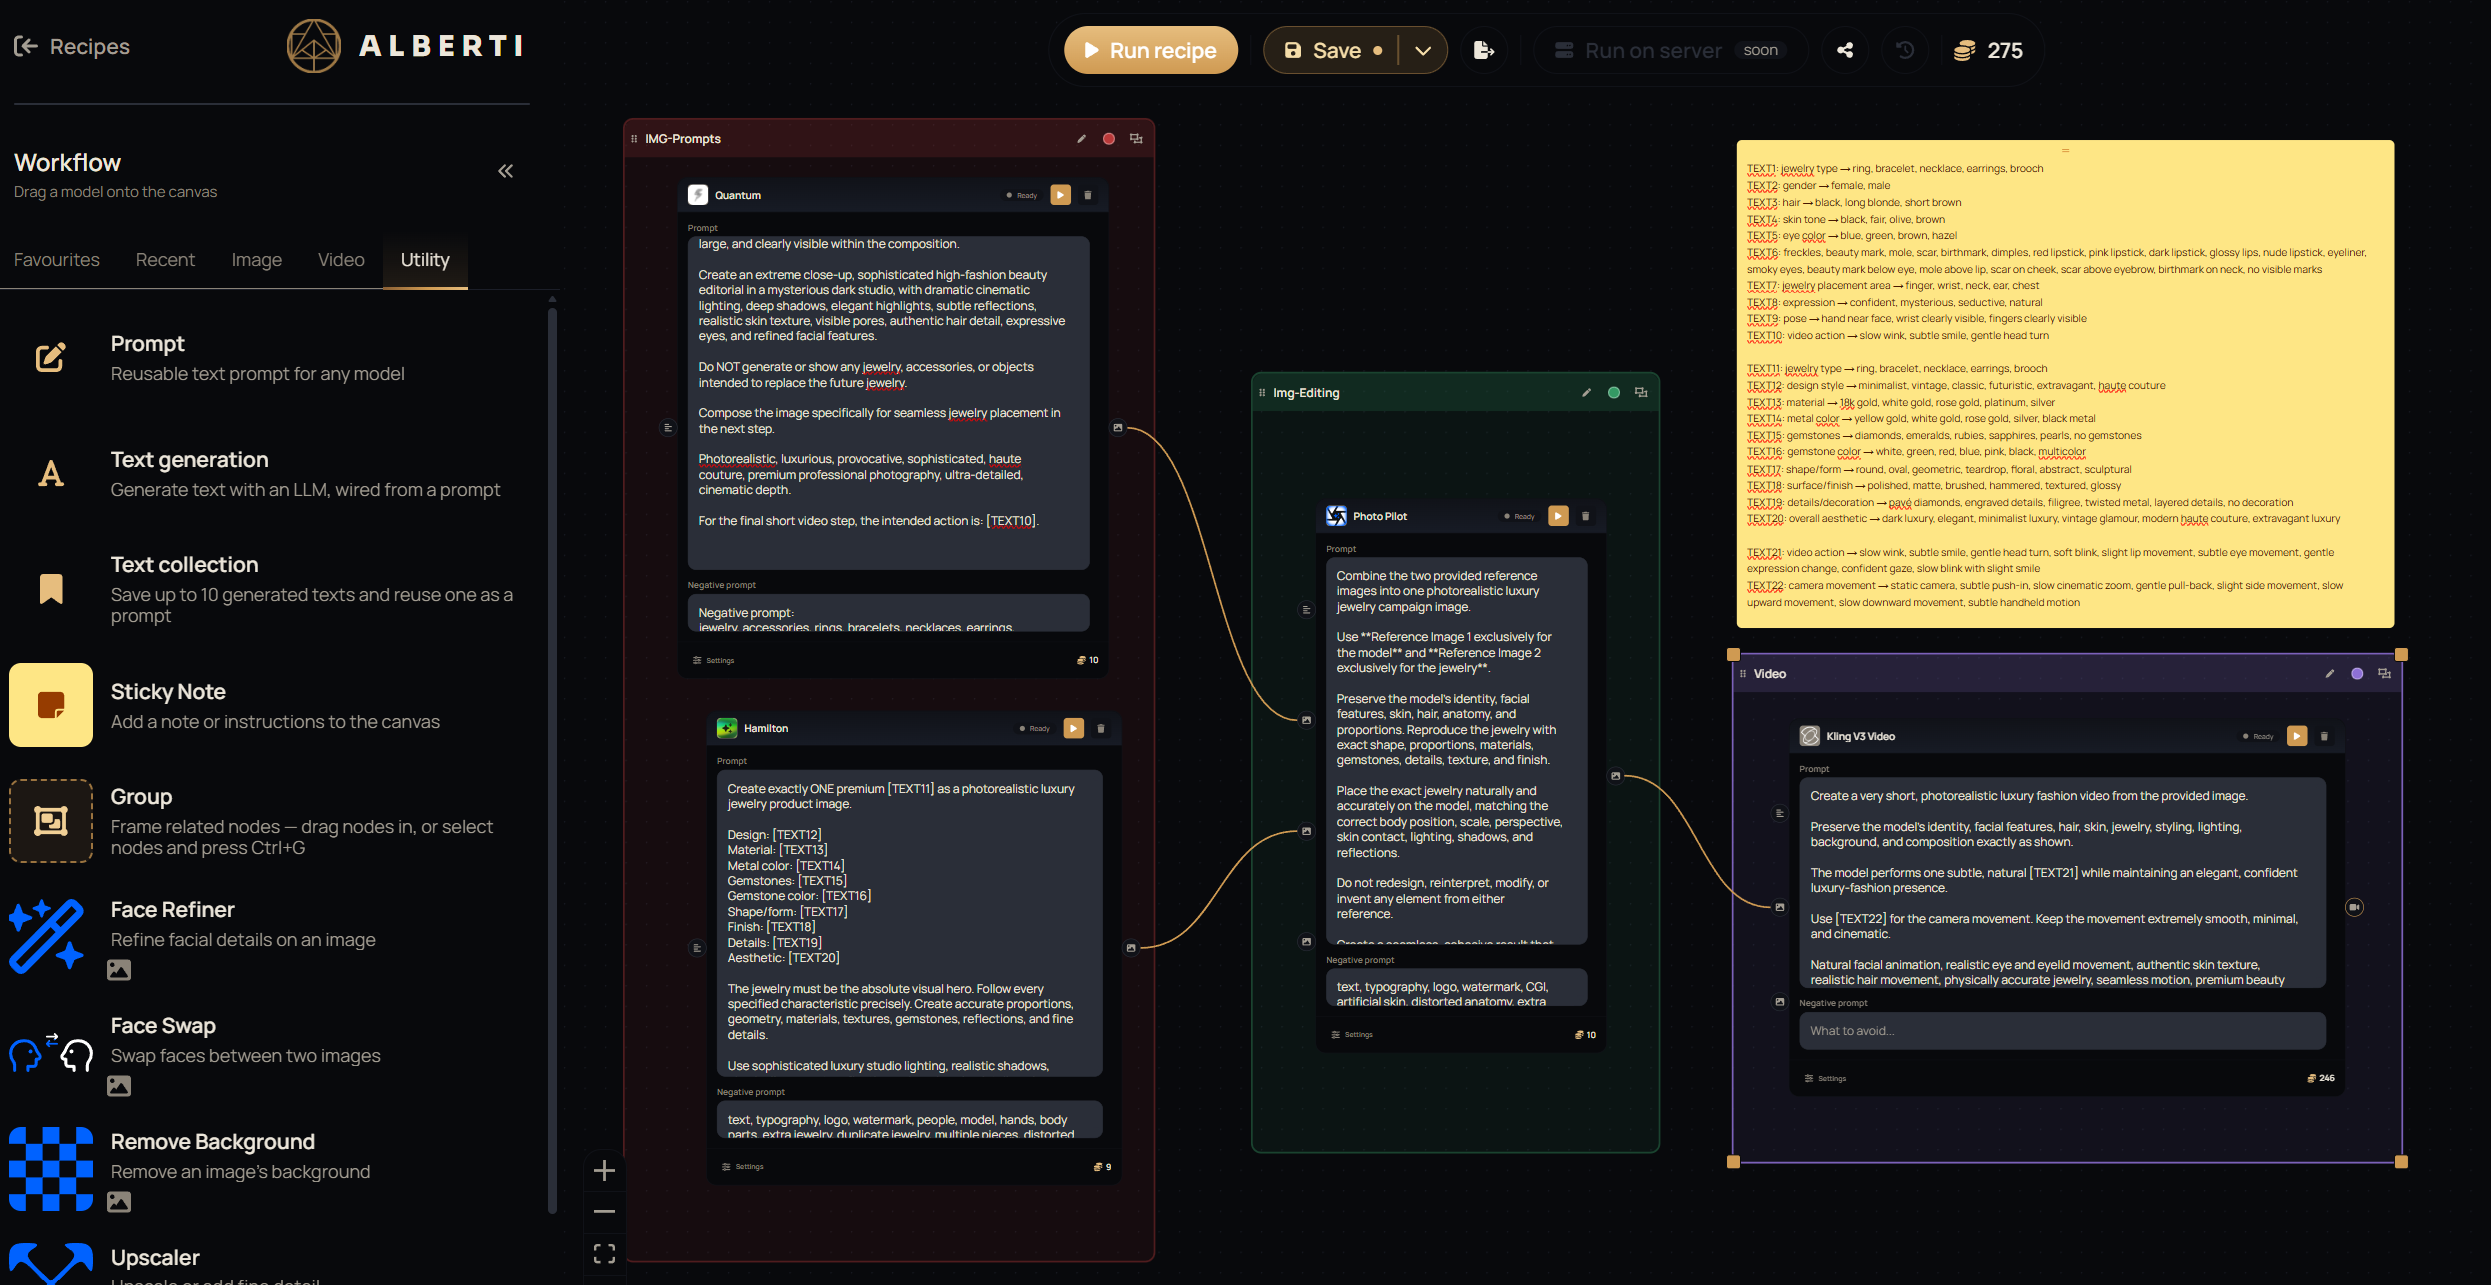
Text collection solves a different problem: Text generation is great at giving you a fresh take on a prompt, but the first result isn’t always the one you want to keep. Wire a Text collection node to a Text generation node’s output, and every time you like what comes back, hit Save latest result to add it to the list — a single Text collection node holds up to ten saved prompts. Select whichever one you actually want, and its Selected text output is what feeds everything downstream, so you can generate a handful of variations, compare them side by side, and only commit once you’ve picked a favorite.
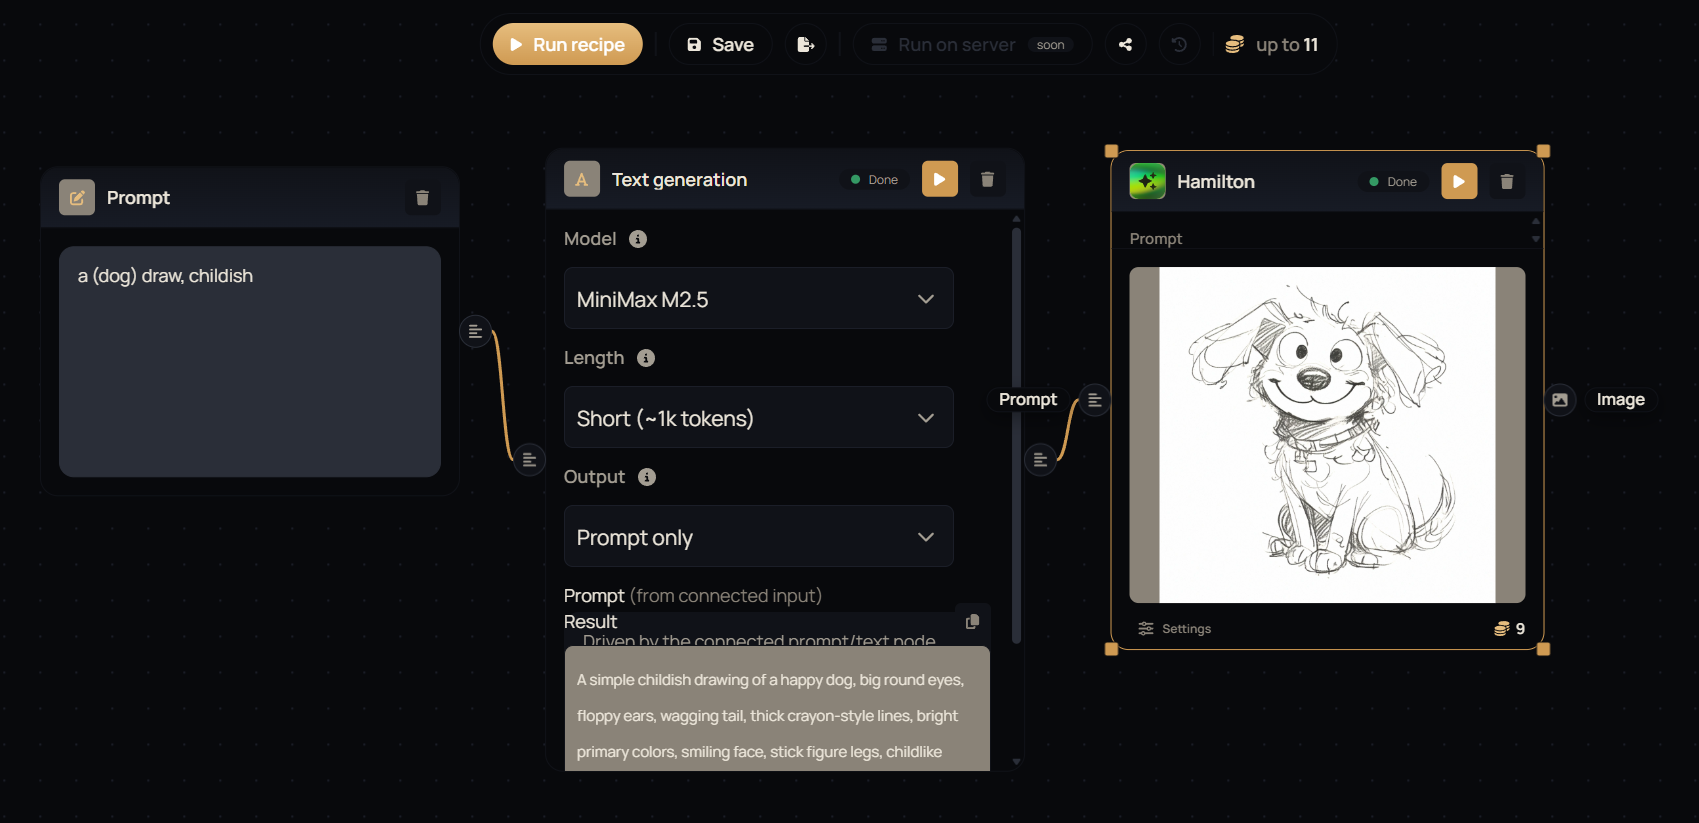
From one line to a full prompt — with costs you can see as you go
Type something as short as “a (dog) draw, childish,” run it through Text generation, and it comes back as a full, model-ready prompt — a simple childish drawing of a happy dog, big round eyes, floppy ears, wagging tail, thick crayon-style lines, bright primary colors, smiling face, stick figure legs, childlike — ready to feed straight into Hamilton.
Every node shows its credit cost, and the top bar totals an estimate for the whole run before you hit Run recipe — here, up to 11. Text generation is metered and refunded down to what you actually used, so that estimate can settle lower once a run finishes. While a recipe is running, stay on the page — leaving stops execution after the current node finishes, and anything downstream never starts. Running recipes directly on our servers, so you can close the tab and let it work in the background, is coming soon.
Every recipe is saved, organized, and reusable
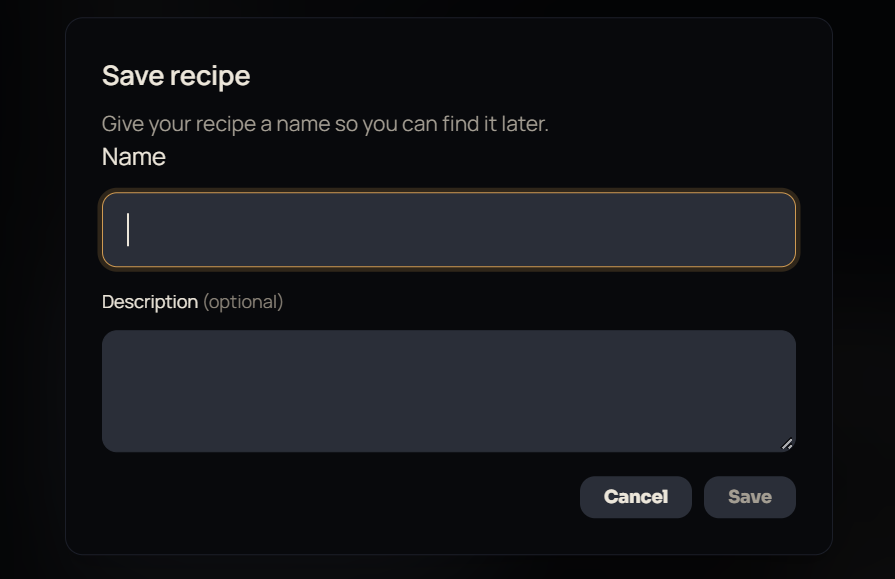
Hit Save to give your recipe a proper name and an optional description, and it lands in your Recipes library, ready to open again whenever you need it.
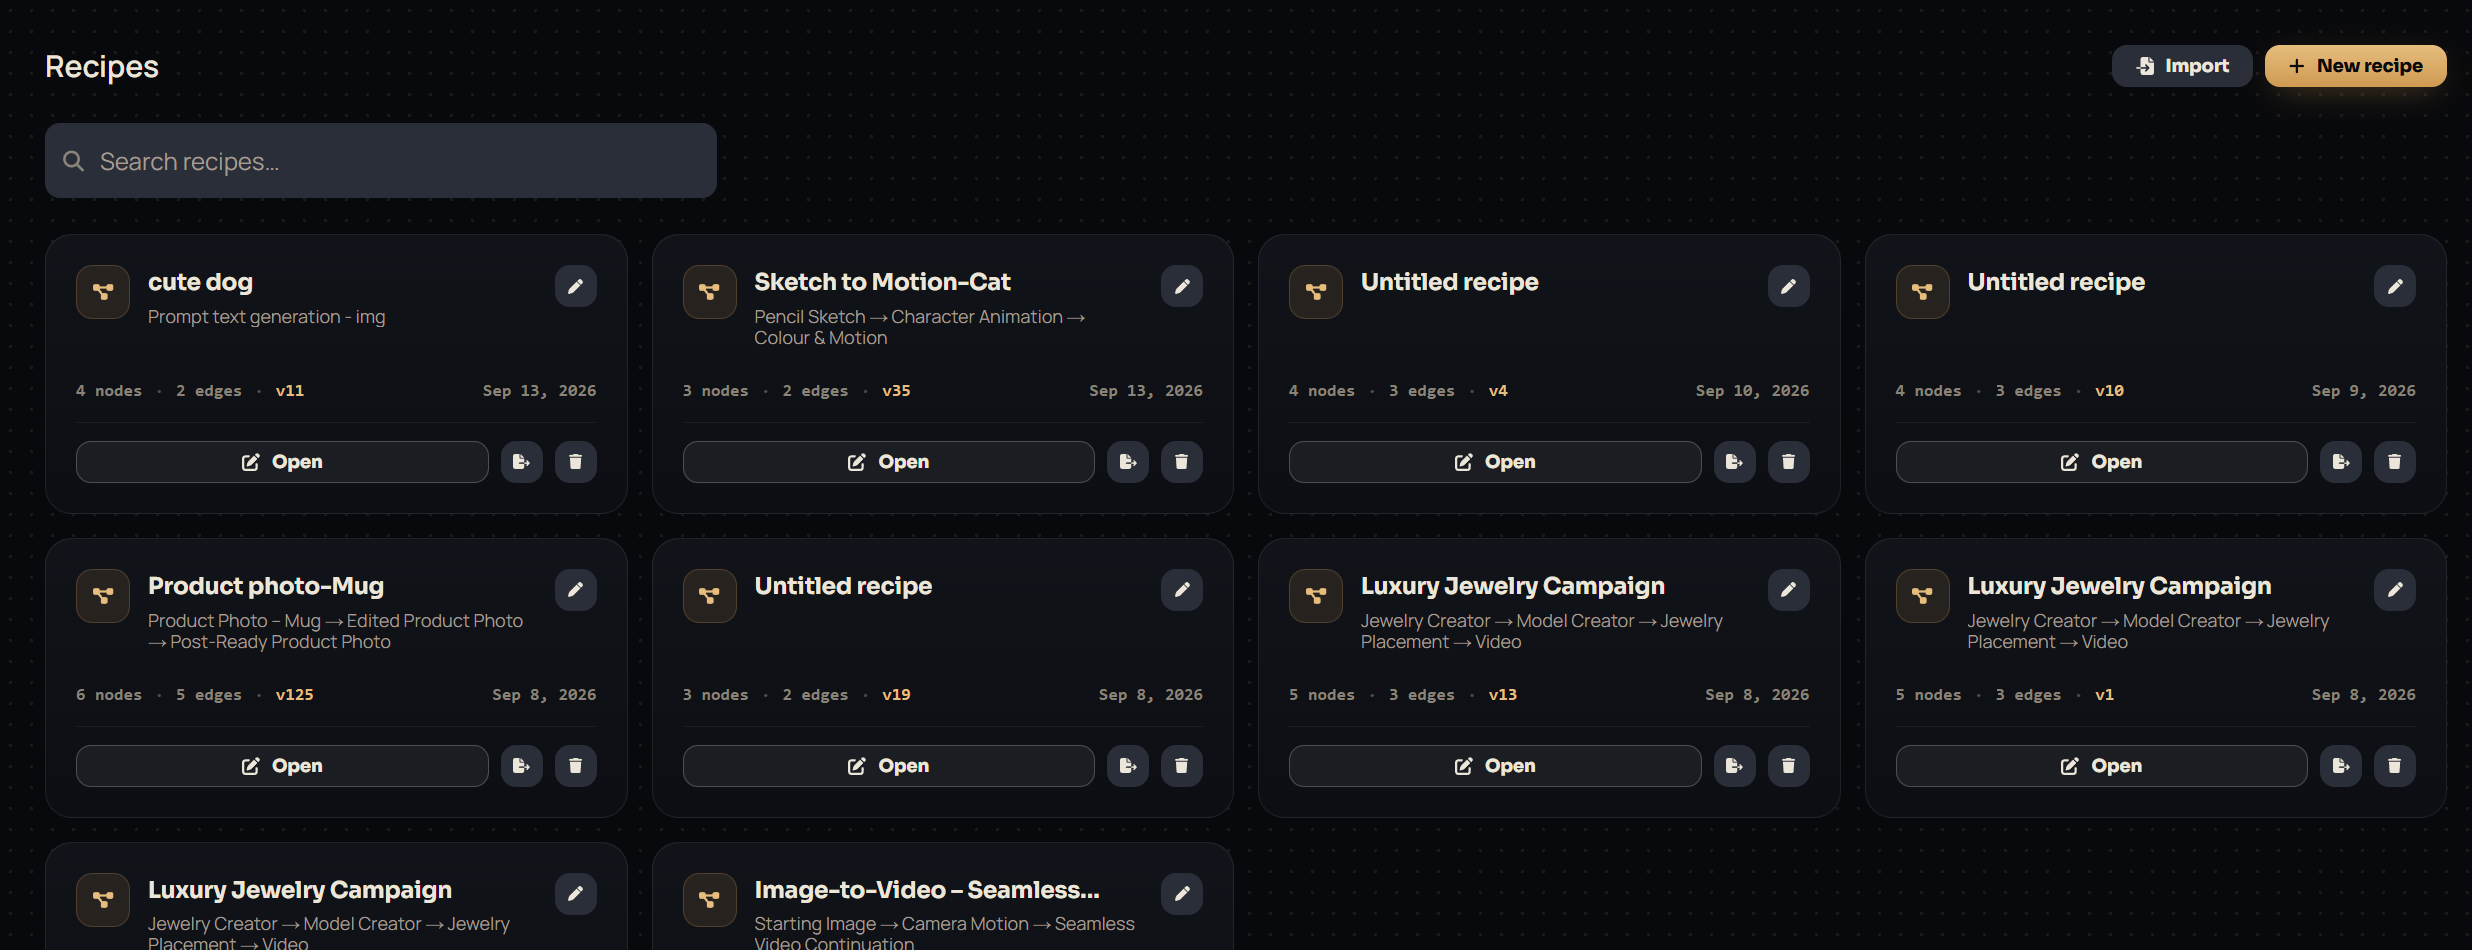
Your library is a searchable grid of every workflow you’ve built, each card showing its pipeline at a glance (Pencil Sketch → Character Animation → Colour & Motion, or Product Photo → Edited Product Photo → Post-Ready Product Photo), along with its node and edge count, version number, and last-edited date. From there you can open, duplicate, export, rename, or delete any recipe.
Share a recipe, or import one
Built something worth handing off? Open Share this recipe and create a link — whoever opens it gets their own fully editable copy of the whole workflow, not just a read-only preview. You can keep multiple active links running at once and revoke any of them individually to cut off access. Recipes can also be imported, so a workflow built by a teammate — or downloaded from somewhere else — can be dropped straight into your own library from the Import button on the Recipes page.

An example: photo to caricature card
Recipes get genuinely useful once you start combining vision, generation, and editing in one chain. Here’s a real one, built from a single uploaded photo.
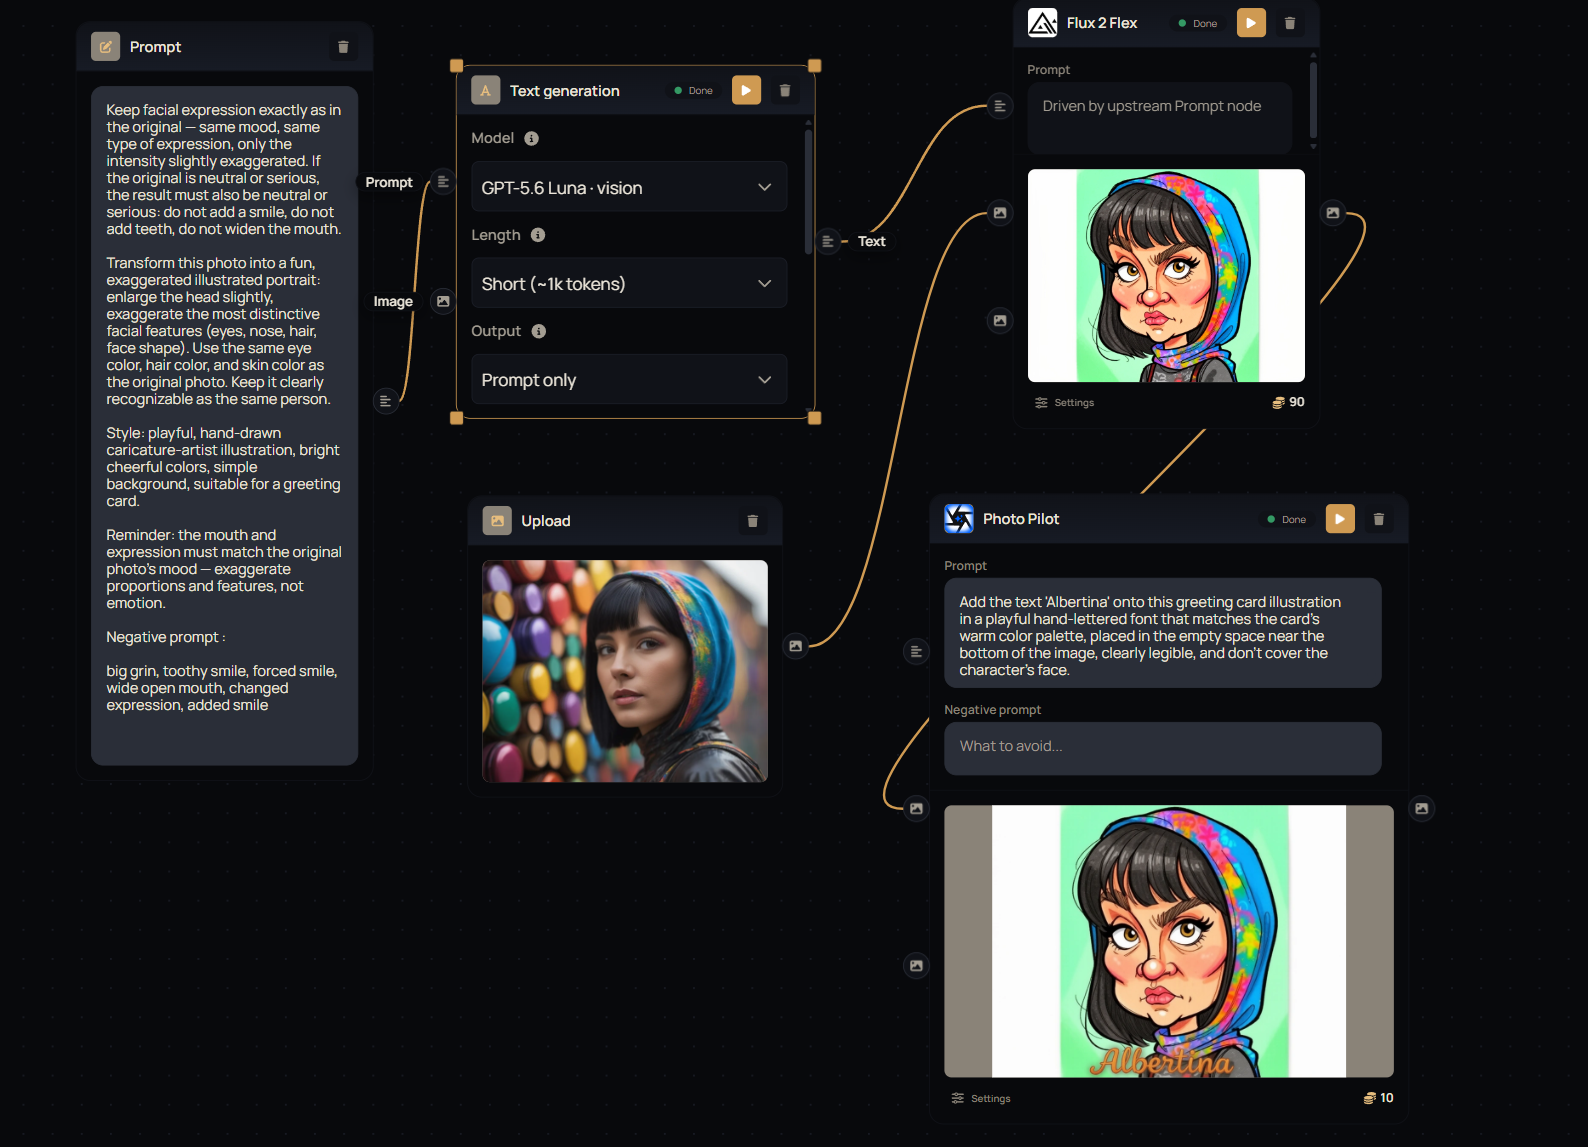
A Prompt node holds the styling brief: exaggerate the features, keep the same expression and mood as the original (no forced smiles), match the same hair, eye, and skin color, illustrated caricature-artist style. The source photo isn’t a separate model — it’s attached directly through the small image icon on a node (here, on Flux 2 Flex), and shows up on the canvas as its own card you can wire wherever it’s needed. The Prompt feeds into a Text generation node, which expands it into a full generation prompt. That prompt, together with the same photo, goes into Flux 2 Flex, which paints the caricature. One more step, Photo Pilot, takes that result and adds a name as a hand-lettered caption — turning it into an actual greeting card. Open this recipe to fork it and drop in your own photo.
When a caricature is too bold: Animate Me
The card above is fun precisely because it exaggerates — and that’s not always what you want. Using that same photo, I wanted a version closer to the original: a clean illustrated portrait, no exaggeration, just a small spark of life to it. So I built a second recipe: Animate Me.
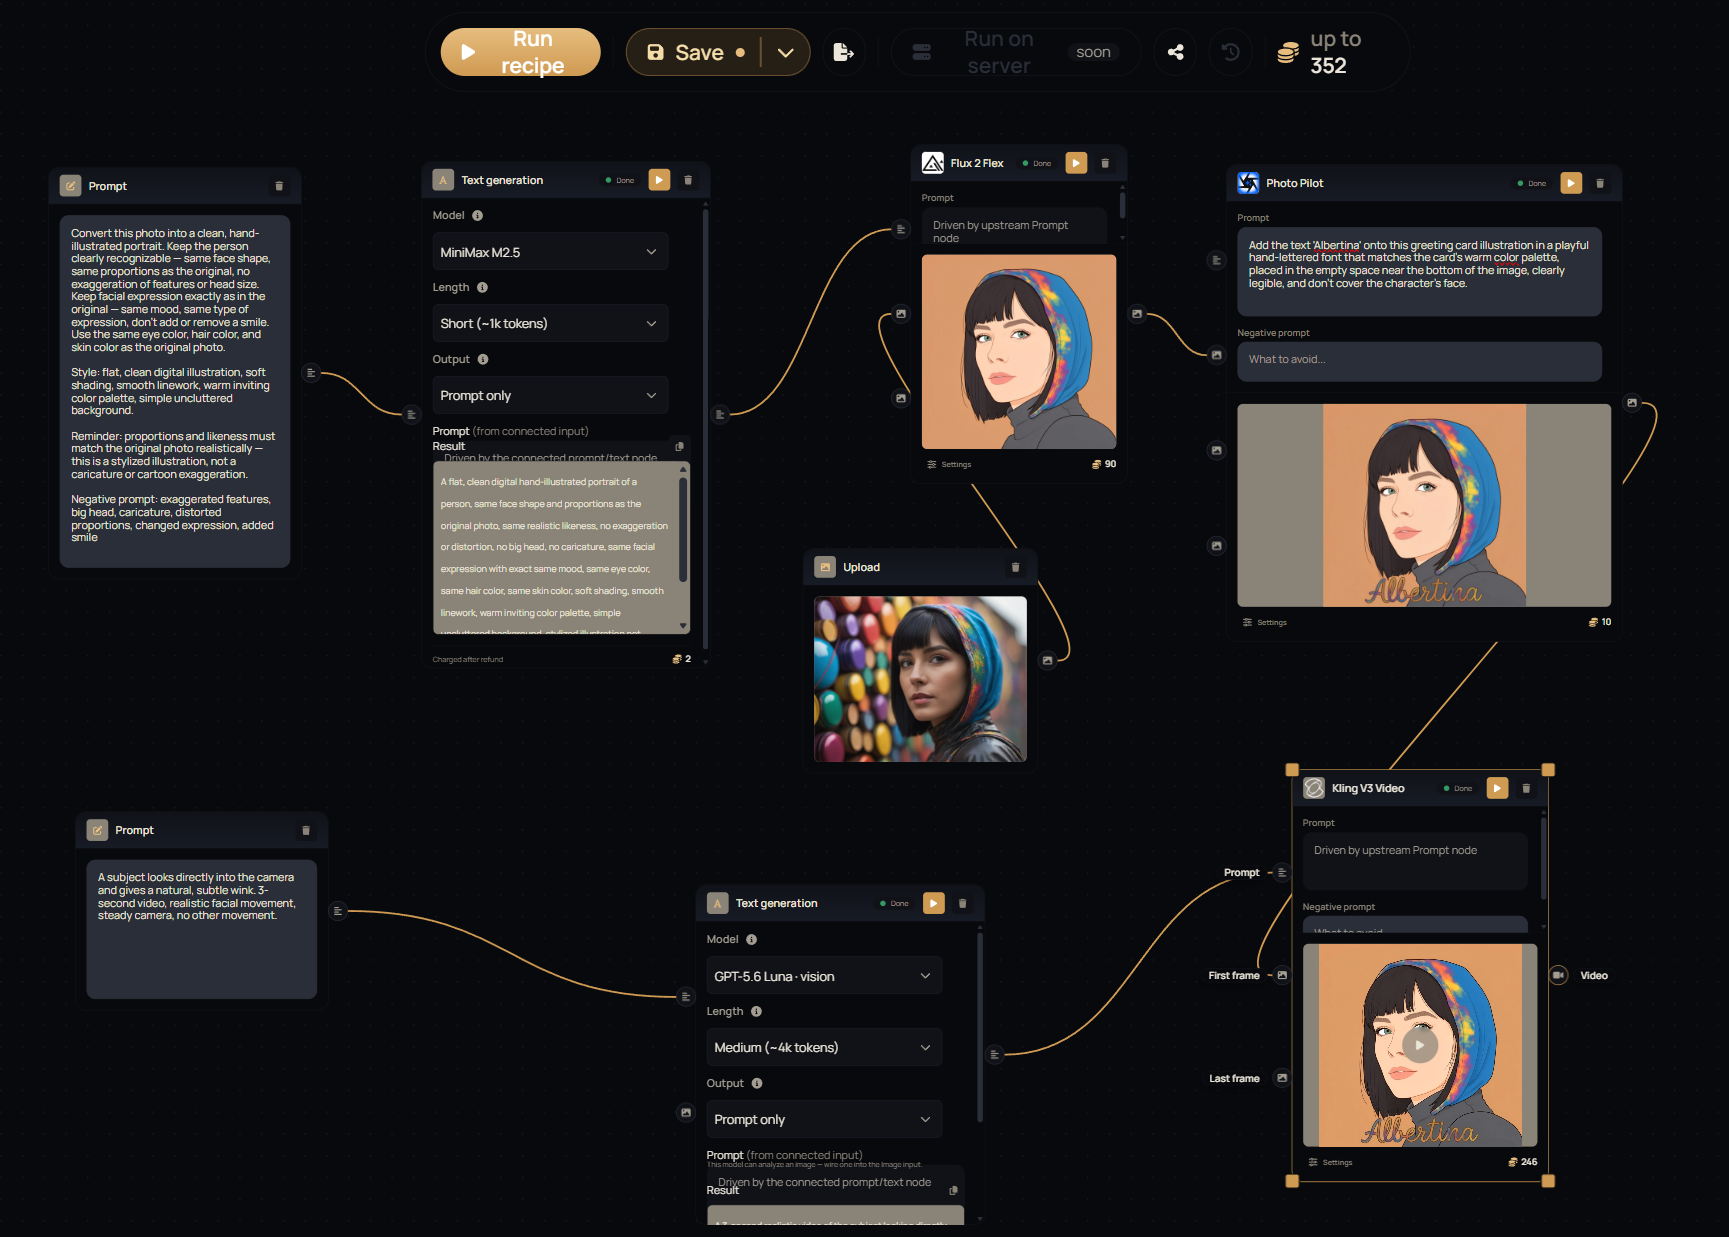
The image side works like the caricature card, minus the exaggeration: a Prompt node describes a clean illustrated portrait that keeps the original proportions, expression, and colors, the same source photo is attached again to Flux 2 Flex, and the Prompt feeds a Text generation node that writes the actual generation prompt for Flux 2 Flex. A Photo Pilot step then hand-letters a name onto the result, same as before. A second, separate pair of nodes handles the motion: a Prompt describing one small natural gesture — a subtle wink, steady camera, nothing else moving — feeds another vision Text generation node, and that output drives Kling V3 Video‘s prompt, while the finished illustration itself is wired in as the video’s First frame. Open this recipe to fork it and try it on your own photo.
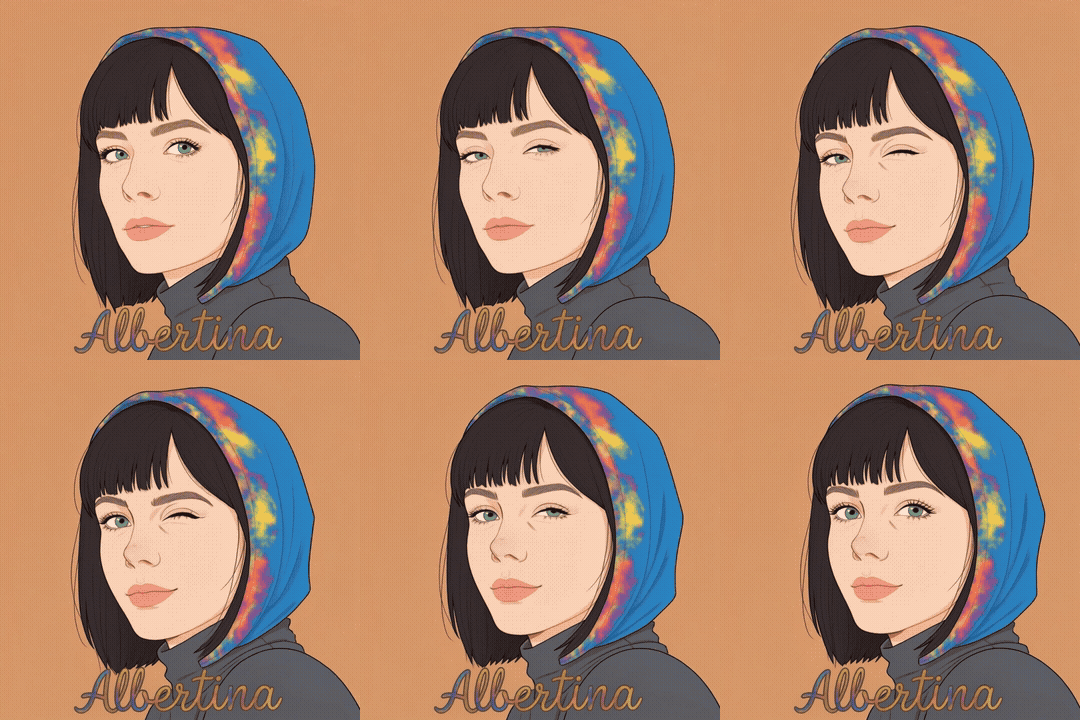
A profile picture that’s unmistakably you — just slightly alive. (Shown here as a looping GIF; the recipe itself outputs a short video.)
Watch it in action
Everything above, start to finish, in one continuous recording: an empty canvas, dragging models in, wiring them together, running the recipe, and the finished result landing in the Recipes library.
Recipes turns a multi-step creative process into something you build once and run as many times as you need — with every model in Alberti Studio available as a building block. Head to your dashboard and drag your first model onto the canvas to get started.
Give it a try, and let us know what you think — ideas, suggestions, anything you run into. We’re actively building this, and your feedback shapes where it goes next.